I am definitely no expert when it comes to this. In fact, I'm only a couple of years into this journey. Although I've been gardening for many years (about 8), I never really thought too much about where my seeds came from. I was only concerned with growing organically. Until a couple of years ago when we moved to the country and started getting really serious about it. While organic is good, it needs to go much deeper than that.
Many of you have probably heard of Monsanto. Or Genetically Modified Organisms. I haven't done a whole lot of research on them cause I'd rather spend my time researching what I DO want to learn, not what I want to stay away from. I have instead invested my time into learning how to grow heirloom organically, and how to harvest my own seeds. All I really know about Monsanto and GMO, is that it's bad news and I don't want anything to do with it. So, THIS is not that kind of post. I DO want to help you understand WHY heirloom is more important than organic when you pick out your seeds to start your next growing project.
Short and sweet answer is that Organic can sometimes still be a hybrid. Or a cross. If you plant a hybrid, the seeds that you will get from it are unstable. Meaning, you won't necessarily get the same thing that you got the seed from. I like to use the reference of people and babies. Two people can have multiple babies, but they are not exact replicas of each other. Each child will have a unique personality and appearance. Well, a hybrid plant will produce multiple kinds of seeds, or no seeds at all (seedless grapes, watermelons, cucumbers, etc) in which are unpredictable and unstable. If you only intend on planting and not collecting seeds for future use, then it's not too much of an issue. Just know that you will have to repurchase your seeds the next time you plant (as is the case with GMO or Monsanto seeds). This is not a self sustainable way of gardening.
Heirloom will produce seeds that you can harvest to plant future gardens with, indefinitely. However, you will need to take precautions to make sure that similar plants don't cross, or become a hybrid. You'll want to learn what plants self pollinate and rarely cross, and which plants are pollinated by bugs and bees and sometimes get crossed, as well as how to prevent crossing. Some plants are even biennial. Meaning they don't go to seed until the 2nd year. For those, you'll want to learn to properly store over winter so that you can plant them back out and gather seeds the following year. This IS a self sustainable way of gardening, and one that is becoming lost. ( For more information on how to collect seeds and prevent crossing of species, please see this link at Seed Savers.)
Most people just go to the store and buy seeds, or to a greenhouse and buy plants. But what if that were not available? Would you know how to grow, harvest, and store in order to feed your family? While gardening can be great fun and a very enjoyable hobby, it is also a very important way of life. It is your backup plan in case it's ever needed! And truly, it is becoming a lost art. If it seems so unusual for US, how do you think it will be for our children and grandchildren to be able to feed themselves?
Even if you only plant a couple of pots of something, or some herbs, I encourage you to learn about heirlooms and seed harvest. Just in case it could ever be useful! :) We are less than a hundred years since this was THE way of life! No grocery stores existed! How quickly we forget!
So, this year when you start planning your garden, please consider incorporating some heirloom varieties. Two of my favorite companies are Seed Savers, and Baker Creek Seed Company although there are several more as well. Just look for the key word of Heirloom.
Happy gardening!
Sunday, February 10, 2013

Thursday, December 27, 2012
Basic Healing Skin Balm
My husband asked me to make some stuff for his foot today, so I quickly got to work and threw together a healing skin balm. Knowing his specific needs, I was able to look through the list of essential oils and their benefits and tailor my concoction especially for him.
You see, last year after his back surgery, he was left with some nerve damage that affects his right leg and foot. He no longer feels hot or cold, nor does he sweat on that foot. Some may think that's kinda cool! Right? But actually, that leaves his one foot excessively dry without the natural moisturizing properties that sweat can bring along with it. His right foot looks and feels as though it belongs to a completely different person than his left! It's dry, rough, and cracked.
You see, last year after his back surgery, he was left with some nerve damage that affects his right leg and foot. He no longer feels hot or cold, nor does he sweat on that foot. Some may think that's kinda cool! Right? But actually, that leaves his one foot excessively dry without the natural moisturizing properties that sweat can bring along with it. His right foot looks and feels as though it belongs to a completely different person than his left! It's dry, rough, and cracked.
So, I looked through the list of essential oils and picked out the ones that were beneficial to dry skin, chapped skin, poor circulation, or mature skin. Then looked through my stash and pulled out the ones I had on hand. There were several more that could have worked that I just didn't have in the cabinet, but the ones I did have and used were: Myrrh, Cedarwood, Rosemary, Eucalyptus, and Tea Tree. I used a total of 100 drops of essential oils. You can mix and match any oils for any purpose that you'd like. So, here's the basic recipe.
4 Tablespoons of organic extra virgin coconut oil ( I get mine from Vitacost)
2 Tablespoons of cocoa butter, shea butter, or any other hardened body butter of your choice
2 Tablespoons of Beeswax pellets, or shredded beeswax
1/2 teaspoon of raw local honey
Essential oils of your choice, specific for the benefit you need out of them. (I really like Mountain Rose Herbs Organic 100% pure essential oils) If you need help knowing which oils to use, this link will take you to a chart of oils and a short clip of it's benefit.
I used:
Myrrh - 30 drops
Cedarwood - 20 drops
Rosemary - 20 drops
Eucalyptus - 15 drops
Tea Tree - 15 drops
Ok, so using a double broiler or similar to melt the coconut oil, cocoa butter (or other butter) and beeswax together. When it's thoroughly melted and incorporated, remove from heat and stir in your honey and essential oils. Pour into your container and let cool.
That's it! Makes one 4 oz. container.
The possibilities are truly endless with this basic recipe. It's so easy to change up the essential oils to whatever you need it to do. Relieve muscle aches, arthritis, acne, oily skin, etc etc etc. Enjoy!
Sunday, December 16, 2012
Choco-mint Lip Balm
Another super easy recipe. When I was looking for a lip balm recipe, the number of results was overwhelming. I ended up basically taking my knowledge and previous experience with making stuff and throwing something together.
Why? Well, cause like I said, it was overwhelming. Plus, almost every recipe had an ingredient in it that I didn't have on hand. So, I just had to wing it.
With that in mind, know that lip balms are incredibly flexible. Meaning, it's difficult to mess it up. Even if you think you messed it up, it's likely still usable, so don't sweat it.
My recipe....sort of. ;)
2 Tablespoons of coconut oil (I get mine from Vitacost. BTW, if you're new to Vitacost and sign up using my link, we both get a $10 code!)
1 Tablespoon Pure Cocoa Butter (this makes the chocolateyness. Can be purchased at Frontier, health food stores, or at Mountain Rose Herbs)
1 Tablespoon Beeswax (can also be purchased at any of the same above places)
8 drops of Peppermint Essential Oil (I prefer Mountain Rose Herbs brand)
1/4 teaspoon of honey
In a double broiler, or similar, melt your coconut oil, Cocoa Butter, and beeswax together. If you use the little beeswax pellets, I've learned that you have to continue heating a few minutes longer than you THINK they've melted. :) Just to be sure. Once it's all melted, remove from heat, add the honey and essential oils and stir. Pour into your awaiting balm containers.
That's it. Done! Takes all of about 10 minutes. Recipe yield was 4 - 1/4 ounce lip balm containers, which I purchased from Frontier for $2.70 for 6 containers. You can truly use anything though.

Why? Well, cause like I said, it was overwhelming. Plus, almost every recipe had an ingredient in it that I didn't have on hand. So, I just had to wing it.
With that in mind, know that lip balms are incredibly flexible. Meaning, it's difficult to mess it up. Even if you think you messed it up, it's likely still usable, so don't sweat it.
My recipe....sort of. ;)
2 Tablespoons of coconut oil (I get mine from Vitacost. BTW, if you're new to Vitacost and sign up using my link, we both get a $10 code!)
1 Tablespoon Pure Cocoa Butter (this makes the chocolateyness. Can be purchased at Frontier, health food stores, or at Mountain Rose Herbs)
1 Tablespoon Beeswax (can also be purchased at any of the same above places)
8 drops of Peppermint Essential Oil (I prefer Mountain Rose Herbs brand)
1/4 teaspoon of honey
In a double broiler, or similar, melt your coconut oil, Cocoa Butter, and beeswax together. If you use the little beeswax pellets, I've learned that you have to continue heating a few minutes longer than you THINK they've melted. :) Just to be sure. Once it's all melted, remove from heat, add the honey and essential oils and stir. Pour into your awaiting balm containers.
That's it. Done! Takes all of about 10 minutes. Recipe yield was 4 - 1/4 ounce lip balm containers, which I purchased from Frontier for $2.70 for 6 containers. You can truly use anything though.

Homemade cough/throat drops
If you've ever made rock handy, or homemade peppermints, you can easily do this project!
It's the same principle of bringing a liquid and a sweetener to 300 degrees, adding in some other good stuff, letting it cool and wahlah!
The players for this project will be:
3 bags of Throat Coat tea (can purchase just about anywhere, but can also get it at Vitacost or Frontier )
1 1/4 cups of water
1 1/3 cup of sweetener of choice (sugar, honey, mix of both, whatever....honey will be a bit gooey-er than just sugar and will likely stick to your teeth a bit)
1/4 teaspoon of menthol crystals (purchased from here)
100% pure essential oils NOT precious essentials or diluted essential oils. They must be pure essential oils. There are tons of different brands, it doesn't matter the name on them, just make sure they are pure and not diluted in a carrier oil already. Personally, I'm a huge fan of Mountain Rose Herbs oils because they are Certified Organic as well as affordable. But use what you love. It's all good!
15 drops lemon essential oil *
15 drops of peppermint essential oil *
10 drops eucalyptus essential oil *
5 drops of tea tree essential oil *
5 drops of lavender essential oil *
Either a candy mold, or a greased pan to pour your hot concoction on when it's ready.
I bought a candy mold at Hobby Lobby with a 40% off coupon. It was less than $2. However, it would have been fine to have just poured into a greased cookie sheet and used a knife to etch a line (cut it) as it started cooling to make for easy breakage when fully set. (I've used that trick on rock candy before and it works well!)
Okey Dokey let's move along and get started.
Put your 3 Throat Coat tea bags in the water and bring it to a boil. Boil for 5 minutes. Remove from heat and cover. Let steep for 15 minutes. You want a really strong tea. After steeping, remove your tea bags squeezing every last drop of strong medicinal goodness out of them and discard.
Add your sweetener of choice and bring back to a boil. Reduce heat so it doesn't scorch. If you can, clip your thermometer to the side of the pan so that the tip is in the liquid, but not touching the bottom of the pan. You'll also want to make sure your pan is large enough that your tea and sugar mix doesn't boil over. It does raise quite a bit as it cooks.
In the meantime, lightly grease your molds or pans with a bit of coconut oil. It will make it easier to remove your cough drops later on.
Once your concoction has reached 300 degrees, remove from heat. Give it a minute to settle down a bit and add your menthol. It WILL release vapors as it hits the contents of the pan! Do NOT breath in the vapors! So stand back a bit when you do this. Stir it in. Add in your essential oils.
You'll want to work quickly, but carefully, to get it all stirred up and poured before it starts hardening.
If using a cookie sheet, remember to take a knife and 'cut' as it's hardening to essentially draw the lines to help it break in the right places.
That's it! You're done! Just let it cool and use as necessary! If you'd like to store them in a container rather than wrap each one individually, you can dust with powdered sugar to prevent them from sticking to each other.

Now, here's the educational section. Why those particular essential oils? Here's the breakdown of their beneficial properties.
*lemon oil benefits - Antibacterial, antidepressant, antifungal, anti-inflammatory, antimicrobial, antirheumatic, antiseptic, antispasmodic, astringent, carminative, digestive, diuretic, hepatic, hypotensive, laxative, sedative, vermifuge
*peppermint oil benefits - Analgesic, anesthetic (topical), antibacterial, anti-inflammatory, antifungal, antimicrobial, antiseptic, antispasmodic, astringent, carminative, cholagogue, cordial, digestive, emmenagogue, expectorant, febrifuge, insecticide, nervine, sedative, stimulant, stomachic, vasoconstrictor, vermifuge
*eucalyptus oil benefits - Analgesic, antibacterial, antifungal, antineuralgic, antirheumatic, antiseptic, antispasmodic, antiviral, decongestant, deodorant, depurative, diuretic, expectorant, febrifuge, stimulant, vermifuge, vulnerary
* tea tree oil benefits - Analgesic, antibacterial, antifungal, anti-inflammatory, antimicrobial, antiparasitic, antiseptic, antiviral, decongestant, deodorant, diaphoretic, expectorant, fungicidal, immune stimulant, insecticide, vulnerary
* lavender oil benefits - Analgesic, antibacterial, antidepressant, anti-inflammatory, antimicrobial, antirheumatic, antiseptic, antispasmodic, aromatic, carminative, cholagogue, deodorant, diuretic, emmenagogue, hypotensive, insecticide, nervine, sedative, stimulant, stomachic, vulnerary
As you see. 4 out of the 5 oils contain analgesic properties! Pain relievers! As is menthol. All of the oils are antifungal, antibacterial, and antiseptic! Helping you get better faster! So enjoy your awesome healthy homemade creation! :)
It's the same principle of bringing a liquid and a sweetener to 300 degrees, adding in some other good stuff, letting it cool and wahlah!
The players for this project will be:
3 bags of Throat Coat tea (can purchase just about anywhere, but can also get it at Vitacost or Frontier )
1 1/4 cups of water
1 1/3 cup of sweetener of choice (sugar, honey, mix of both, whatever....honey will be a bit gooey-er than just sugar and will likely stick to your teeth a bit)
1/4 teaspoon of menthol crystals (purchased from here)
100% pure essential oils NOT precious essentials or diluted essential oils. They must be pure essential oils. There are tons of different brands, it doesn't matter the name on them, just make sure they are pure and not diluted in a carrier oil already. Personally, I'm a huge fan of Mountain Rose Herbs oils because they are Certified Organic as well as affordable. But use what you love. It's all good!
15 drops lemon essential oil *
15 drops of peppermint essential oil *
10 drops eucalyptus essential oil *
5 drops of tea tree essential oil *
5 drops of lavender essential oil *
Either a candy mold, or a greased pan to pour your hot concoction on when it's ready.
I bought a candy mold at Hobby Lobby with a 40% off coupon. It was less than $2. However, it would have been fine to have just poured into a greased cookie sheet and used a knife to etch a line (cut it) as it started cooling to make for easy breakage when fully set. (I've used that trick on rock candy before and it works well!)
Okey Dokey let's move along and get started.
Put your 3 Throat Coat tea bags in the water and bring it to a boil. Boil for 5 minutes. Remove from heat and cover. Let steep for 15 minutes. You want a really strong tea. After steeping, remove your tea bags squeezing every last drop of strong medicinal goodness out of them and discard.
Add your sweetener of choice and bring back to a boil. Reduce heat so it doesn't scorch. If you can, clip your thermometer to the side of the pan so that the tip is in the liquid, but not touching the bottom of the pan. You'll also want to make sure your pan is large enough that your tea and sugar mix doesn't boil over. It does raise quite a bit as it cooks.
In the meantime, lightly grease your molds or pans with a bit of coconut oil. It will make it easier to remove your cough drops later on.
Once your concoction has reached 300 degrees, remove from heat. Give it a minute to settle down a bit and add your menthol. It WILL release vapors as it hits the contents of the pan! Do NOT breath in the vapors! So stand back a bit when you do this. Stir it in. Add in your essential oils.
You'll want to work quickly, but carefully, to get it all stirred up and poured before it starts hardening.
If using a cookie sheet, remember to take a knife and 'cut' as it's hardening to essentially draw the lines to help it break in the right places.
That's it! You're done! Just let it cool and use as necessary! If you'd like to store them in a container rather than wrap each one individually, you can dust with powdered sugar to prevent them from sticking to each other.

Now, here's the educational section. Why those particular essential oils? Here's the breakdown of their beneficial properties.
*lemon oil benefits - Antibacterial, antidepressant, antifungal, anti-inflammatory, antimicrobial, antirheumatic, antiseptic, antispasmodic, astringent, carminative, digestive, diuretic, hepatic, hypotensive, laxative, sedative, vermifuge
*peppermint oil benefits - Analgesic, anesthetic (topical), antibacterial, anti-inflammatory, antifungal, antimicrobial, antiseptic, antispasmodic, astringent, carminative, cholagogue, cordial, digestive, emmenagogue, expectorant, febrifuge, insecticide, nervine, sedative, stimulant, stomachic, vasoconstrictor, vermifuge
*eucalyptus oil benefits - Analgesic, antibacterial, antifungal, antineuralgic, antirheumatic, antiseptic, antispasmodic, antiviral, decongestant, deodorant, depurative, diuretic, expectorant, febrifuge, stimulant, vermifuge, vulnerary
* tea tree oil benefits - Analgesic, antibacterial, antifungal, anti-inflammatory, antimicrobial, antiparasitic, antiseptic, antiviral, decongestant, deodorant, diaphoretic, expectorant, fungicidal, immune stimulant, insecticide, vulnerary
* lavender oil benefits - Analgesic, antibacterial, antidepressant, anti-inflammatory, antimicrobial, antirheumatic, antiseptic, antispasmodic, aromatic, carminative, cholagogue, deodorant, diuretic, emmenagogue, hypotensive, insecticide, nervine, sedative, stimulant, stomachic, vulnerary
As you see. 4 out of the 5 oils contain analgesic properties! Pain relievers! As is menthol. All of the oils are antifungal, antibacterial, and antiseptic! Helping you get better faster! So enjoy your awesome healthy homemade creation! :)
Thursday, December 13, 2012
Homemade Organic, Petroleum Free, "vapo" rub

Petroleum. Derived from crude oil, is not what you want to be breathing into your lungs. Or absorbing into your skin. Especially not when you're sick! Sure, the menthol and camphor helps you breath, clears the nostrils, and even reduces coughing. But why not get the benefits without the petroleum? It's simple enough!
Here's how ya do it.
First, gather all of your supplies.

8 teaspoons beeswax pellets or grated
4 tablespoons cocoa butter, shea butter, mango butter, kokum butter, etc. (can be purchased here.)
1 cup coconut oil (I like to order from Vitacost. I order 2 big containers of Vitacost brand and get free shipping even!)
2 teaspoons menthol crystals (can be purchased here)
40 drops each eucalyptus, camphor, rosemary, peppermint, and
lavendar
30 drops cinnamon bark (all of the oils I used for this came from Mountain Rose Herbs. They are Certified Organic and of excellent quality and price!)
Using a double broiler, or similar, melt beeswax, butters, and coconut oils together.

Once everything is thoroughly melted, add in the menthol crystals. Stand back when you do this! The fumes are potent and you do not want to breath them in! Menthol is a solid at room temperature, but melts somewhere between 105 and 110 degrees. You'll want to make sure your oils are at least that warm to add and melt the menthol.
Remove from heat and add in your essential oils. Stir together, then pour into the containers you'll want to store your new rub in.

It starts cooling and hardening up almost instantly!
Rub on feet to mellow coughs, rub on chest, back, under nose to help breathing if dealing with colds and flu.
***** However, DO NOT use on children under 6!!!! Do NOT rub on their chest, under noses, etc of small children! Children have been hospitalized from high rates of menthol from essential oils like Peppermint, Camphor, and Eucalyptus. It can cause severe responses and their throat to close up! Would probably be ok to rub on feet and cover with socks for older children though, and is fine for adults.*******
Great stuff and much better for you than the petroleum based ones! Very similar to the more natural ones you can purchase as well! For comparison, here is the back side of a natural rub that I had on hand. See the ingredients list!

So, there ya go!
Saturday, November 24, 2012
Chocolate Covered Cherries
These have become a favorite of our family and friends. They were introduced to me about 8 years ago. The recipe came out of a magazine, but I can't, for the life of me, remember what that magazine was! The original recipe was for white chocolate covering. Although I've also made them milk chocolate as well. Both are very good!
You know how when you add sugar to some sliced strawberries and stick them in the fridge overnight, they make syrup and are yummy on shortcake? Well, it's sort of the same idea. You wrap Maraschino Cherries in a powdered sugar concoction and then seal that inside of chocolate, while the sugar encourages a syrup to form around the cherry. I honestly think they taste better at room temperature. Especially after they've been sitting out for a couple of days. However, I usually keep them refrigerated or even frozen just so I don't eat so many! Well, and so that I can keep them long enough to give them away.
Without further ado, here we go!
 |
| Ingredients: powdered sugar, chocolate, baking cocoa, cherries, butter, vanilla and almond extracts. |
 |
| Soften the butter. I stuck mine in the micro for 30 seconds just cause it was straight from the fridge. Even better is to let it sit out to room temp. |
 |
| Measure out your sugar, cocoa, and vanilla. |
 |
| Drain the cherries and lay them on a paper towel. Gently pat them dry. Mix up your powdered sugar concoction. |
 |
| Wash your hands well. Dry them, then add some coconut oil to them. Take a teaspoon or so of your sugar mix and roll it up, then pat it out flat on your hand. |
 |
| Put one cherry inside then roll the sugar mix around it. |
 |
 |
| Then roll it like a meatball. |
 |
| Set it on a tray or cookie sheet covered in wax paper. |
Once you get all of your cherries rolled in chocolate and sugar, you'll want to take a break. Stick your tray in the fridge for at least a couple of hours to let the sugar and butter harden up. I usually even put them in the freezer for a few minutes before I start dipping them in the chocolate. So, take a break and clean up your mess. You've got a minimum of 2 hours before the next step. This can even stay in the fridge overnight and resumed the next morning if you'd like.
 |
| Put your chocolate in a bowl with some coconut oil and a dash of almond extract. |
 |
| Microwave for 1 minute. Stir, then add 15-30 seconds til it's melted, stirring often until you've got it nice and runny. |
 |
| Stick a toothpick in 1 very cold cherry ball. Roll it in the chocolate, drop your cherry back on the tray, then use a little dab of chocolate on the toothpick to cover up the hole that it made in the cherry. |
Lick the toothpick, then get another one for the next cherry. I, wisely, did not take a picture of my pile of dirty toothpicks. :)
Once your cherries are all dipped, stick them in the fridge or freezer for a few minutes.
In the meantime, make your contrasting chocolate.
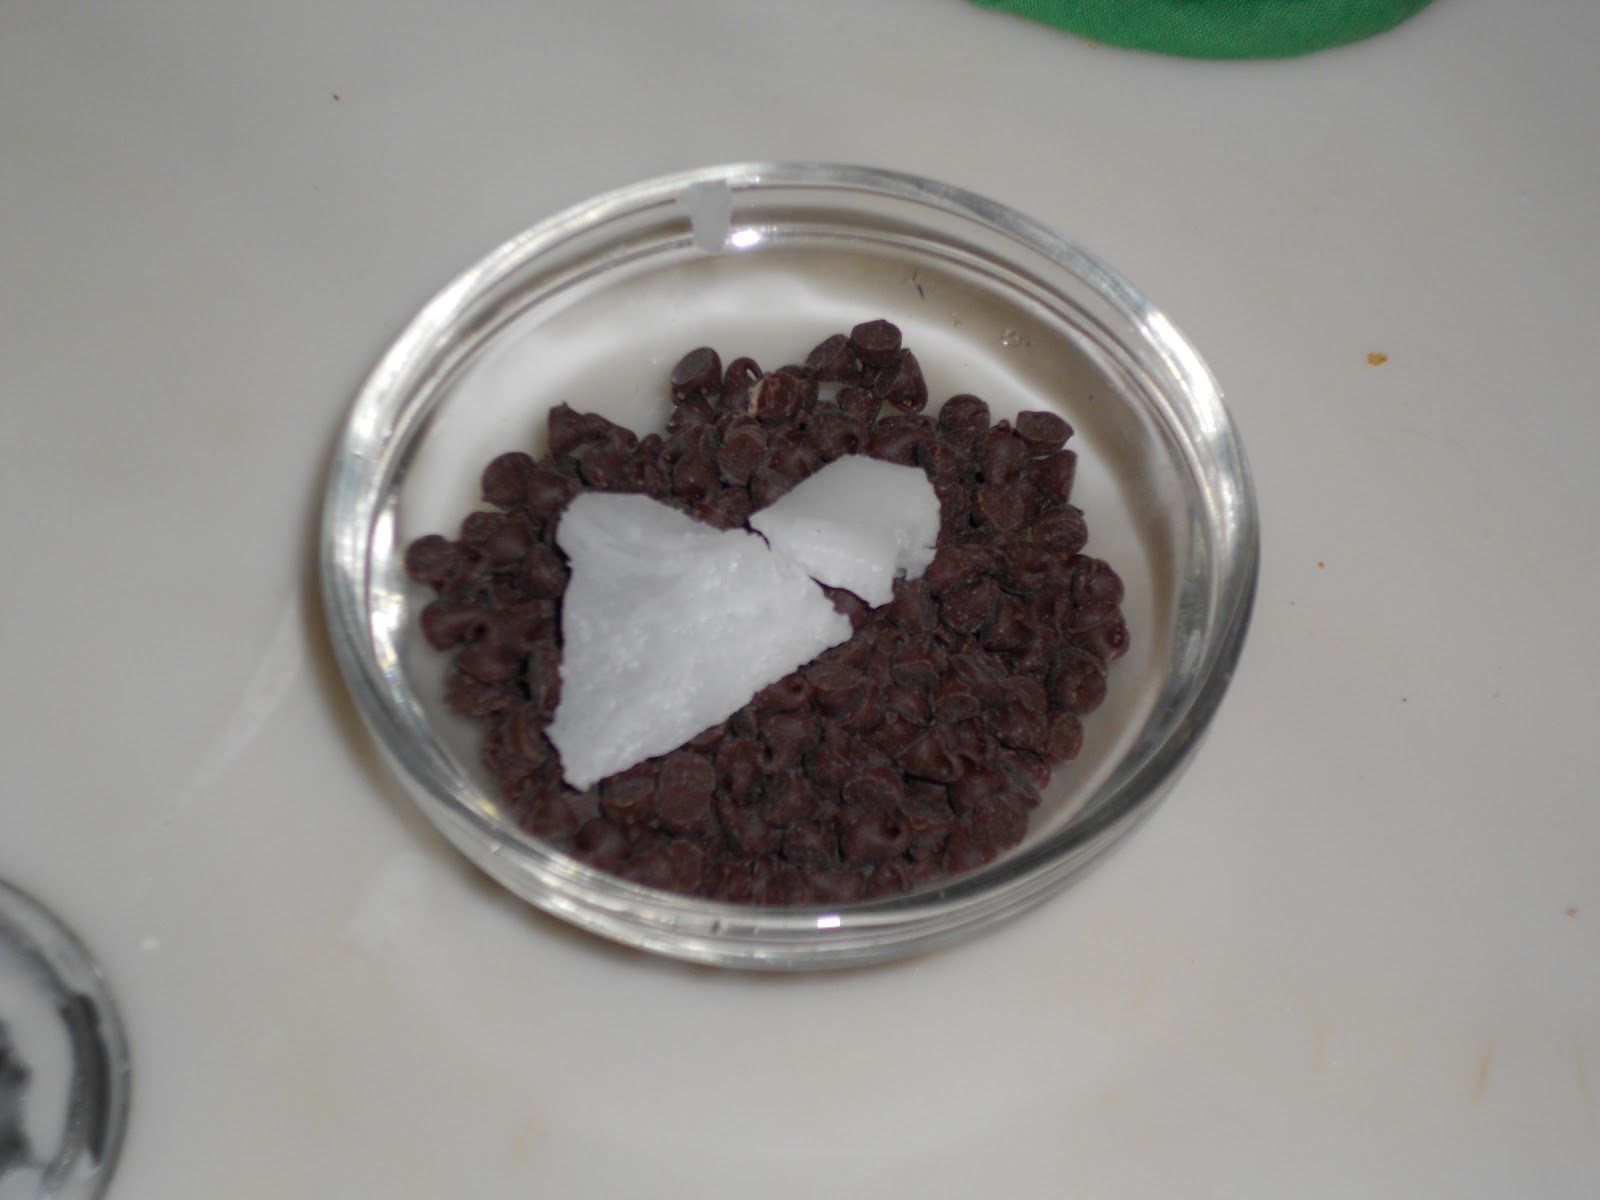 |
| About a 1/4 cup of mini chocolate chips and a bit of coconut oil. Microw'ed for about 30 seconds. |
 |
| You'll want it really drippy so you can fling it and drizzle it. |
 |
| The finished product! Let it chill to harden and wahlah! Eat any imperfect ones and give away the beauties! |
36-48 maraschino cherries with stems - well drained ( I used 2 small jars without stems)
1/4 c (1/2 stick) butter, softened
2 cups powdered sugar
1/4 cup baking Cocoa or dutch processed cocoa
1 to 2 tablespoons milk, divided (I didn't use any milk this time....but if it's too dry, then add a bit of milk)
1/2 teaspoon vanilla extract
1/4 teaspoon almond extract
white chip coating
chocolate chip drizzle
or vice versa
1.Cover tray with wax paper. lightly press cherries between layers of paper towels to remove excess moisture.
2.Beat butter, powdered sugar, cocoa (and 1 tablespoon milk if needed) in small bowl until well blended; stir in vanilla. if necessary, add remaining milk, one teaspoon at a time, until mixture will hold together but is not wet.
3.Mold scant teaspoon mixture around each cherry, covering completely; place on prepared tray. cover; refrigerate 3 hours or until firm.
4. Prepare white chip coating. holding each cherry by stem, dip into coating. place on tray; refrigerate until firm.
5. About one hour before serving, prepare chocolate chip drizzle; with tines of fork, drizzle randomly over candies. refrigerate until drizzle is firm. store in refrigerator.
White Chip Coating: place 1 2/3 cups (10 oz. pkg.) Hershey's premier white chips in small microwave-safe bowl; drizzle with 2 tablespoons coconut oil and almond extract. microwave at high (100%) 1 minute, stir. If necessary, microwave at high an additional 15 seconds at a time, stirring after each heating until chips are melted and mixture is smooth. If mixture thickens while coating, microwave at high 15 seconds; stir until smooth.
Chocolate Chip Drizzle: Place 1/4 cup Hershey's milk chocolate chips and 1/4 teaspoon oil, in another small microwave safe bowl. Microwave at high (100%) 30 seconds to 1 minute; stir until chips are melted and mixture is smooth.
1/4 c (1/2 stick) butter, softened
2 cups powdered sugar
1/4 cup baking Cocoa or dutch processed cocoa
1 to 2 tablespoons milk, divided (I didn't use any milk this time....but if it's too dry, then add a bit of milk)
1/2 teaspoon vanilla extract
1/4 teaspoon almond extract
white chip coating
chocolate chip drizzle
or vice versa
1.Cover tray with wax paper. lightly press cherries between layers of paper towels to remove excess moisture.
2.Beat butter, powdered sugar, cocoa (and 1 tablespoon milk if needed) in small bowl until well blended; stir in vanilla. if necessary, add remaining milk, one teaspoon at a time, until mixture will hold together but is not wet.
3.Mold scant teaspoon mixture around each cherry, covering completely; place on prepared tray. cover; refrigerate 3 hours or until firm.
4. Prepare white chip coating. holding each cherry by stem, dip into coating. place on tray; refrigerate until firm.
5. About one hour before serving, prepare chocolate chip drizzle; with tines of fork, drizzle randomly over candies. refrigerate until drizzle is firm. store in refrigerator.
White Chip Coating: place 1 2/3 cups (10 oz. pkg.) Hershey's premier white chips in small microwave-safe bowl; drizzle with 2 tablespoons coconut oil and almond extract. microwave at high (100%) 1 minute, stir. If necessary, microwave at high an additional 15 seconds at a time, stirring after each heating until chips are melted and mixture is smooth. If mixture thickens while coating, microwave at high 15 seconds; stir until smooth.
Chocolate Chip Drizzle: Place 1/4 cup Hershey's milk chocolate chips and 1/4 teaspoon oil, in another small microwave safe bowl. Microwave at high (100%) 30 seconds to 1 minute; stir until chips are melted and mixture is smooth.
Friday, November 16, 2012
All natural homemade laundry products
I've been hesitant to try home made laundry soap. For several reasons. 1) I REALLY love Eco's Laundry Detergent. Especially their Magnolia and Lily scented one. The Lemongrass scent is heavenly as well. I love climbing into bed with freshly washed sheets and breathing in their scents. The Eco detergent also already has a soy based fabric softener in it. And, since I get it through our Frontier co-op group, it's a steal compared to what you'd buy it for in the stores. 2) Many of the recipes I've seen for home made detergents call for use of a soap that is not very natural and includes synthetic detergents in it, and I really wanted to skip the synthetics.
For instance, the popular Fels Naptha and Ivory soaps, use synthetic detergents. For the most part, if you aren't using a pure castile soap, or a truly GOOD, natural, expensive soap, you aren't really getting the benefit of it being a natural laundry detergent, you're still using synthetic. BUT, if your purpose is simply for cost savings, then it doesn't matter the type of soap you use. You'll still save money by making your own!
My suggestion, however, is to go as natural as possible. I used Kirk's Castile Soap. The ingredients are Coconut Soap, Water, Vegetable Glycerin, Coconut Oil. Says right on the package "No Synthetic Detergents". Plus, by getting it through the Frontier co-op, it was only $1.25 for a 4 oz bar. You could even save more by buying a 3 pack for just $3.50 I may be mistaken, but I BELIEVE that's even cheaper than you can buy the Fels Naptha.
And finally, I just wasn't sure if it would REALLY clean as well as the more expensive soaps. So, I put it to the ultimate test. Out here in the country. We get clothes DIRTY, and I mean dirty with capital letters. No doubt about it. I took many before and after pictures. My final impression. WOW! It was super easy to make, super cheap, and it actually cleans! I'm sold! This week, my 2 youngest little angels even decided to write on my sunny yellow bed sheets with ink pen! Came out, no problem.


For instance, the popular Fels Naptha and Ivory soaps, use synthetic detergents. For the most part, if you aren't using a pure castile soap, or a truly GOOD, natural, expensive soap, you aren't really getting the benefit of it being a natural laundry detergent, you're still using synthetic. BUT, if your purpose is simply for cost savings, then it doesn't matter the type of soap you use. You'll still save money by making your own!
My suggestion, however, is to go as natural as possible. I used Kirk's Castile Soap. The ingredients are Coconut Soap, Water, Vegetable Glycerin, Coconut Oil. Says right on the package "No Synthetic Detergents". Plus, by getting it through the Frontier co-op, it was only $1.25 for a 4 oz bar. You could even save more by buying a 3 pack for just $3.50 I may be mistaken, but I BELIEVE that's even cheaper than you can buy the Fels Naptha.
And finally, I just wasn't sure if it would REALLY clean as well as the more expensive soaps. So, I put it to the ultimate test. Out here in the country. We get clothes DIRTY, and I mean dirty with capital letters. No doubt about it. I took many before and after pictures. My final impression. WOW! It was super easy to make, super cheap, and it actually cleans! I'm sold! This week, my 2 youngest little angels even decided to write on my sunny yellow bed sheets with ink pen! Came out, no problem.
Comparison Pics

Before
After


Before
After


Before
After


Before
After


Before
After


Before
After

As you can see, it works very well.
I prefer liquid detergent, and some of the reviews I've read on the powdered detergents where not the greatest. Particularly for cold washing. So, I stuck to a liquid recipe. If you've ever made liquid hand soap before, this is pretty much the same consistency. It's low suds, so you don't really see bubbles in your wash, but it does clean! I suppose if I'd never made hand soap before, I'd be a little more turned off by the consistency, but it's familiar to me, so no big deal. Otherwise, it's kinda like snot. Also, this can be used in both high efficiency and regular washers. The recipe I looked at, called for only 3 ounces of grated soap. Since my soap bar was 4 ounces, I just used the whole thing in my recipe. If you really wanted to stretch your dollars and soap, you could. I just didn't know what else to do with an ounce of soap so just grated it up along with the rest.
Ingredients
1 - 3-4 ounce bar of Kirk's Castile Soap, grated (or your favorite soap, either scented or unscented)
1/2 cup of washing soda
1/2 cup of borax
About 2 gallons of clean water


Add the grated soap to a pot and 6 cups of warm water. Heat on the stove on medium, stirring occasionally, until the soap flakes dissolve. In the meantime, add the washing soda and borax to your bucket with 4 cups of warm water and stir until dissolved. When the soap flakes are ready, add them to your bucket and stir. Add another 1 gallon + 6 cups of warm water. Stir some more. Put the lid on your bucket and let it sit for 24 hours til it "gels". You can stir it up with a big wooden spoon anytime. At first, it looked kind of solid on top, with big chunks of more solid like gel soap blocks as I started stirring, but it mixed up pretty well.

Use 1/2 cup for each load.
Fabric Softener
For fabric softener, use 1/2 cup of vinegar. Either white, or apple cider vinegar, doesn't matter. You can also add a couple drops of any essential oil of your choice to the vinegar. Either put this in the fabric softener spot of your washer, or in a downy ball.
The essential oils aren't a necessity. It does smell nice while your clothes are washing, but it doesn't leave a lasting scent. Nor does the vinegar. Your clothes just come out smelling clean. If you want to add some essential oils to your laundry soap, you can do that as well. But for the most part, it's just an added kick of antifungal, antibacterial properties to your laundry and it makes your house smell nice while they're washing. I like to use peppermint. :)
If you struggle with static cling, the biggest issue is the type of material your clothes are made from. Synthetic fibers will almost always get static cling. Particularly in the cooler, dryer months. Materials like cotton or linen won't have the same problem. So take this all into consideration as well. You may need to use a more commercial product with some of your clothes, but be able to utilize wool dryer balls and a wad of aluminum foil in the dryer for more natural materials. I know, it sounds crazy, but it works! I keep some Seventh Generation Free and Clear Fabric Softener for when I need to wash snow suits and coats, but for most of our clothes, I use the wool balls. You can get Willow Store brand from Frontier for $10 for 3 balls. I also think Norwex sells some too, but uncertain of the price. Sometimes tennis balls would work, but be sure they are lead free. And that little tip of aluminum foil? Well, if the dryer balls aren't enough, sometimes a wad of foil can help add just enough static cutting help to do the trick.
If you struggle with static cling, the biggest issue is the type of material your clothes are made from. Synthetic fibers will almost always get static cling. Particularly in the cooler, dryer months. Materials like cotton or linen won't have the same problem. So take this all into consideration as well. You may need to use a more commercial product with some of your clothes, but be able to utilize wool dryer balls and a wad of aluminum foil in the dryer for more natural materials. I know, it sounds crazy, but it works! I keep some Seventh Generation Free and Clear Fabric Softener for when I need to wash snow suits and coats, but for most of our clothes, I use the wool balls. You can get Willow Store brand from Frontier for $10 for 3 balls. I also think Norwex sells some too, but uncertain of the price. Sometimes tennis balls would work, but be sure they are lead free. And that little tip of aluminum foil? Well, if the dryer balls aren't enough, sometimes a wad of foil can help add just enough static cutting help to do the trick.
And finally, dryer sheets. Simply cut an old cotton t shirt or flannel into any size you'd like and add a few drops of your favorite essential oil. ( Can find Essential Oils here. ) A good size for your dryer sheet is about 5 inches square. Add about 3 drops of oil and toss in! You can use your same 'dryer sheet' for 2-3 loads. After that, just toss into your washer and wash and then use again for more drying or try with different scents.
Why not use commercial fabric softeners and dryer sheets? Well, because many of the fragrances used in commercial products are quite toxic and can be absorbed into your clothing and through your skin. They are blamed for many skin problems and can aggravate eczema, dry skin, rashes, or allergies. So why not go as natural as possible?
And there you have it. Natural laundry detergent, fabric softener, and even 'dryer sheets'. If you haven't tried it, give it a shot! I was pleasantly surprised and I hope you are too!
Subscribe to:
Posts (Atom)